Why a RV A/C need a Soft Starter? And How it Works?

Eliminate Low-Power Start-Up Issues For Your RV A/C

How to install ?

How to install ?

X-PLUS RV A/C Soft Starter should be installed by a qualified technician

Acquire manufacturer’s wiring diagram for the air conditioning unit (provided with purchase).Turn off power to the RV unit. Verify from the manufacturer’s wiring if there are any start-assist devices such as: start capacitors, start relays or PTCRs.

If present, these need to be removed. Follow the Start winding connection from the Compressor into the control box. This should terminate onto a run capacitor (HERM terminal, in case of a dual capacitor). If the same terminal has other wires terminated, these must be disconnected and electrically isolated.

1

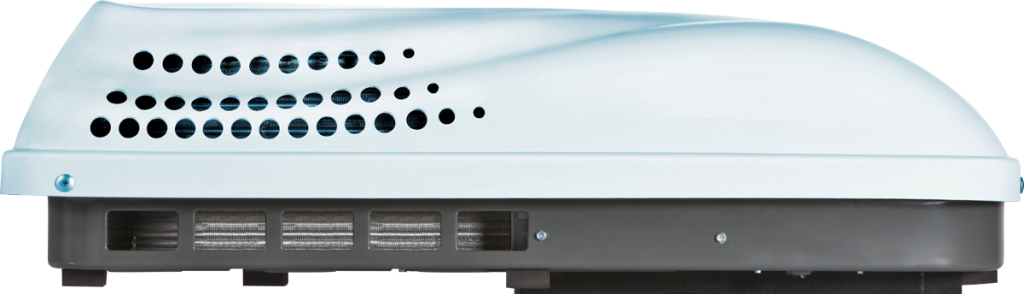
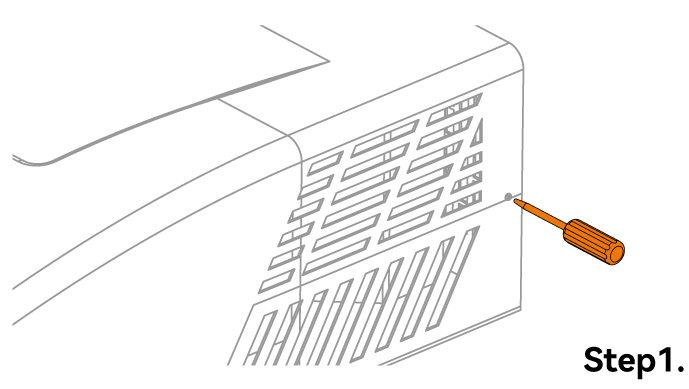
Open the top hood of the RV air-conditioning. If necessary, gain access to the compressor’s wiring by removing any additional foam covers.

2

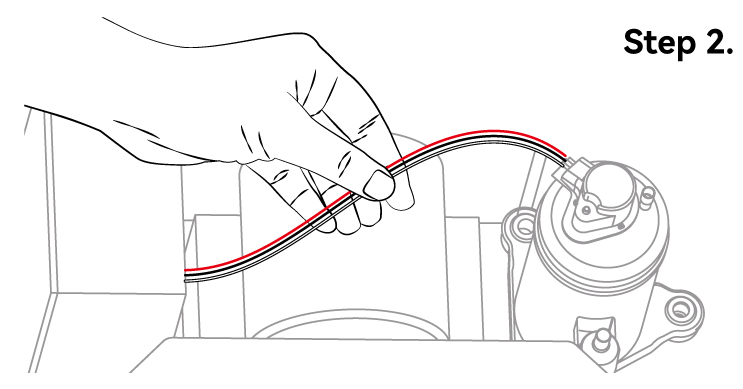
Identify the three wires (Run, Start and Common) routed to the compressor. Most often, these are routed through a sleeve cover.

3

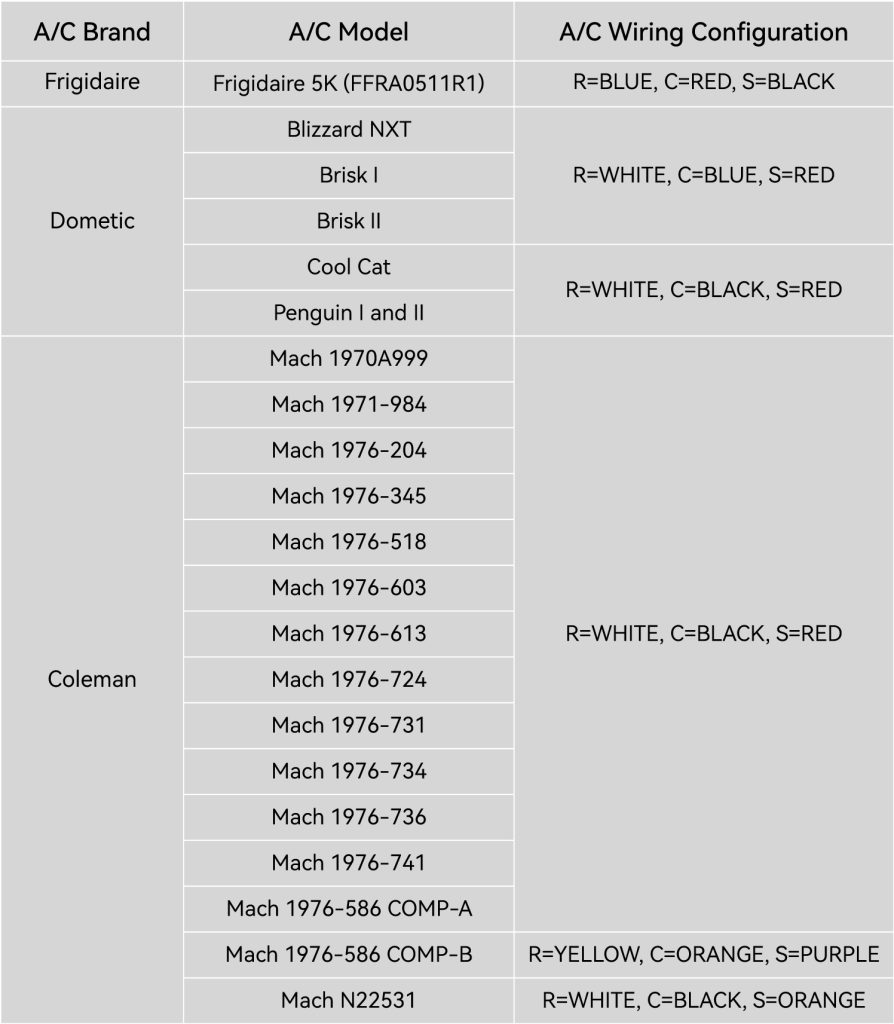
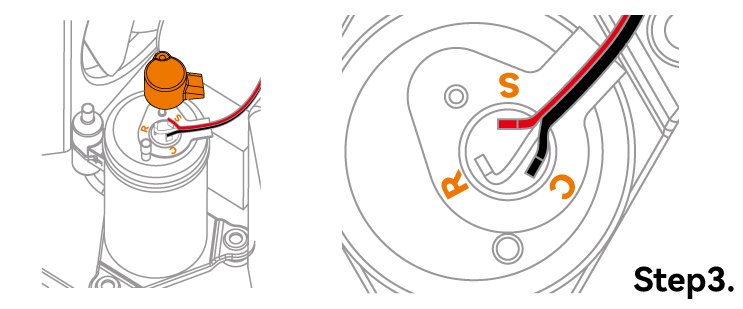
Open the compressor cover and note the corresponding (R, S, C) color of the wires.

4

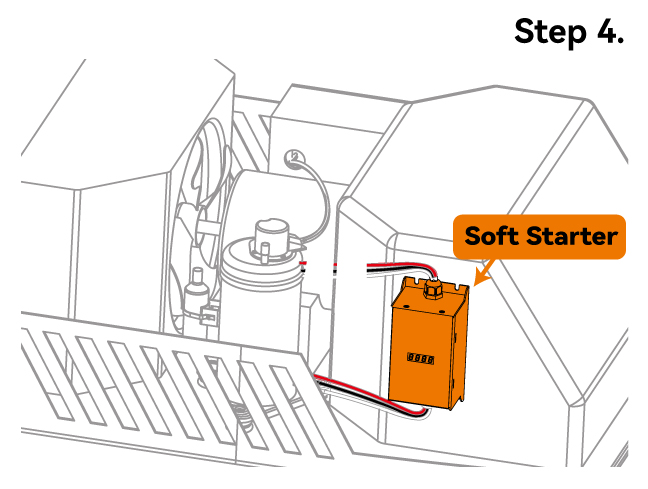
Identify a suitable location to place the soft-starter. Please avoid placing the soft-starter and its wiring in the following areas.
• In the direct path of an air vent,
• In proximity (less than 2 inches) to copper pipes (inlet or discharge),
• Near rotating mechanical parts,
• Near heat sources,
• A place that interferes with closing the top hood.
Suitable locations to place the soft-starter are:
• Inside/adjacent to the foam cover,
• On the base floor.

5

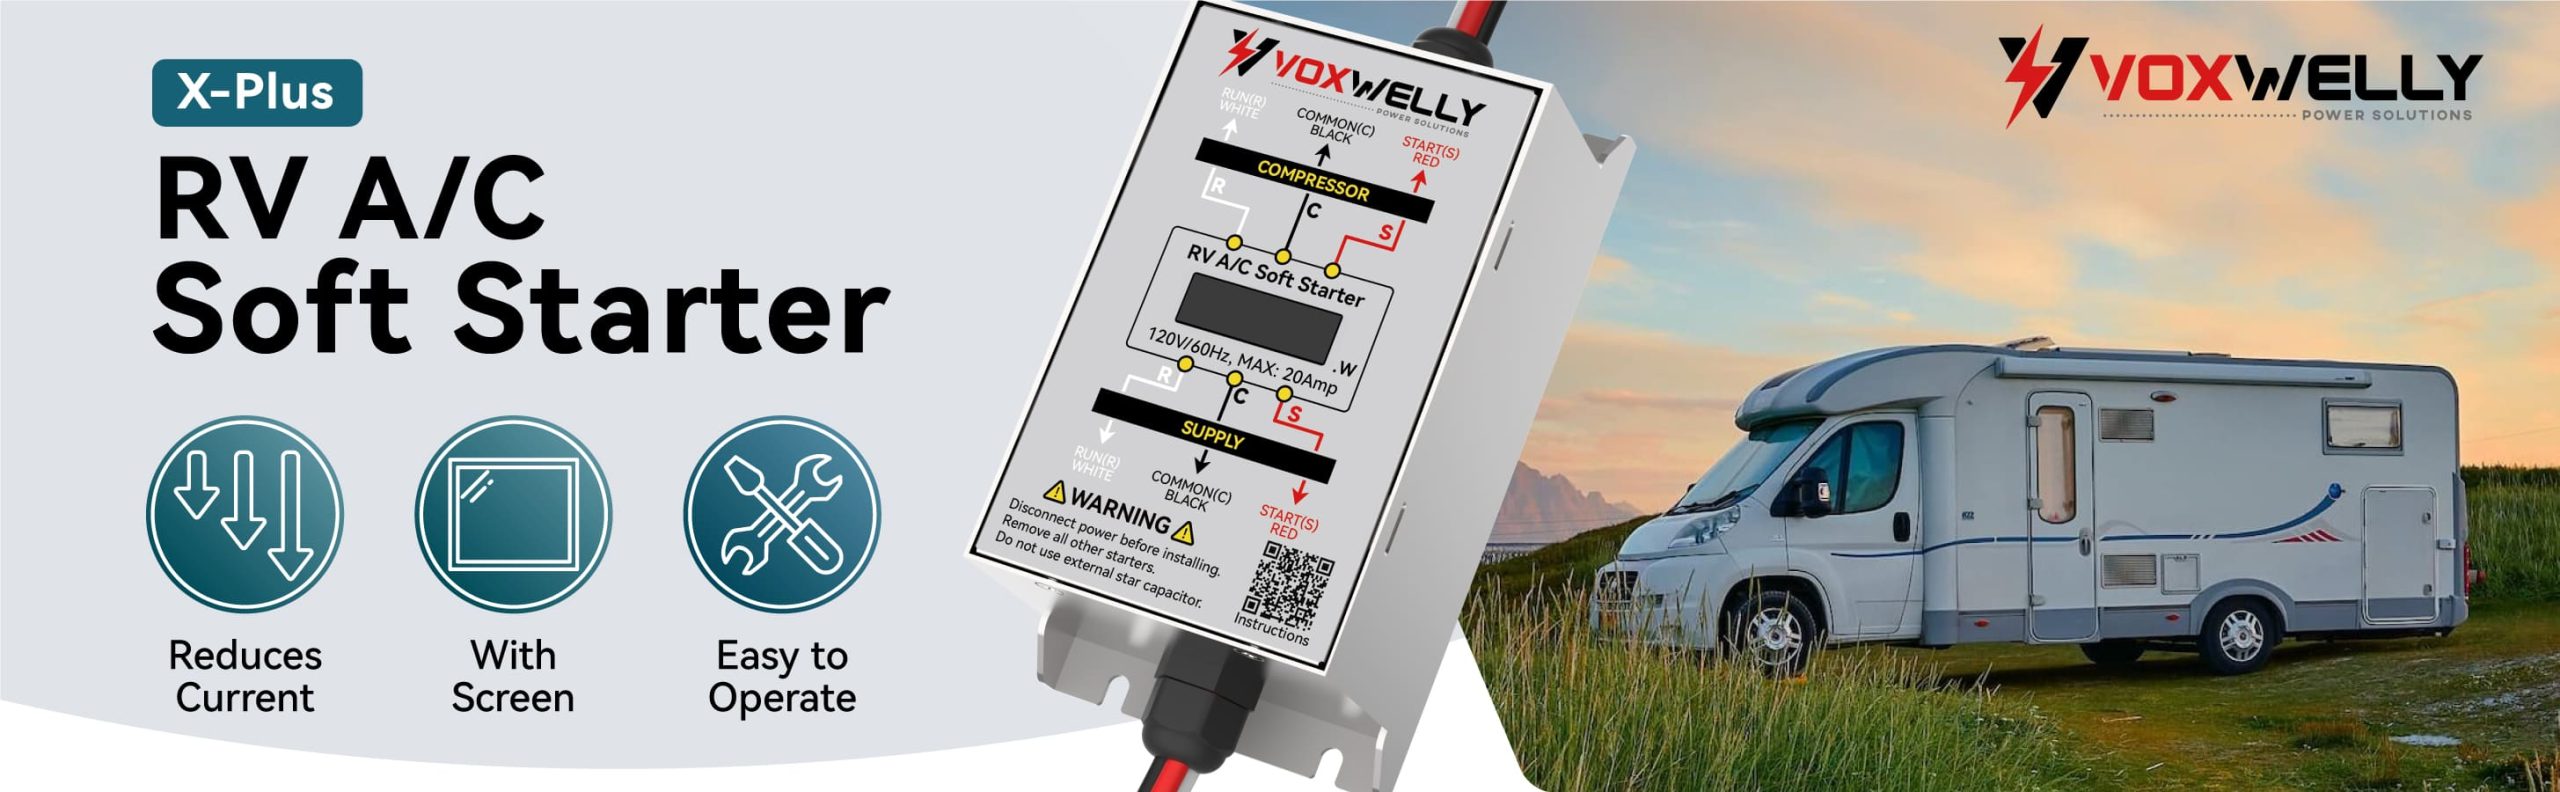
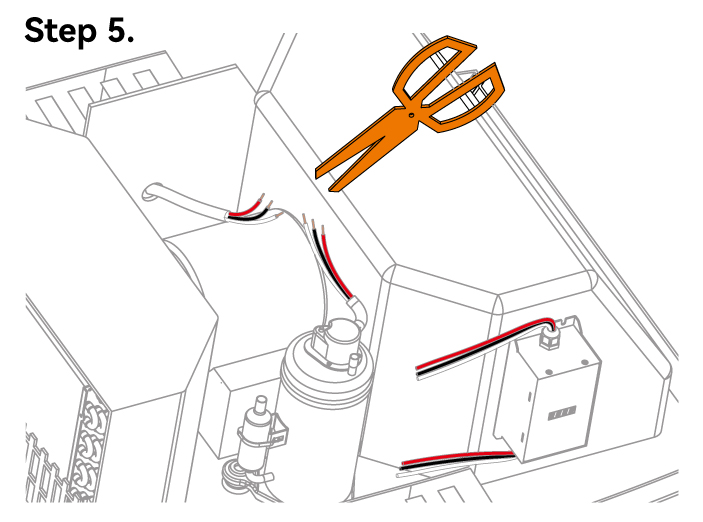
Cut the compressor three wires at a location within range of the soft-starter wire harnesses. Clearly identify the supply and compressor sides of the connections. In this illustration, Lower section is Compressor side and Upper section is Supply side.
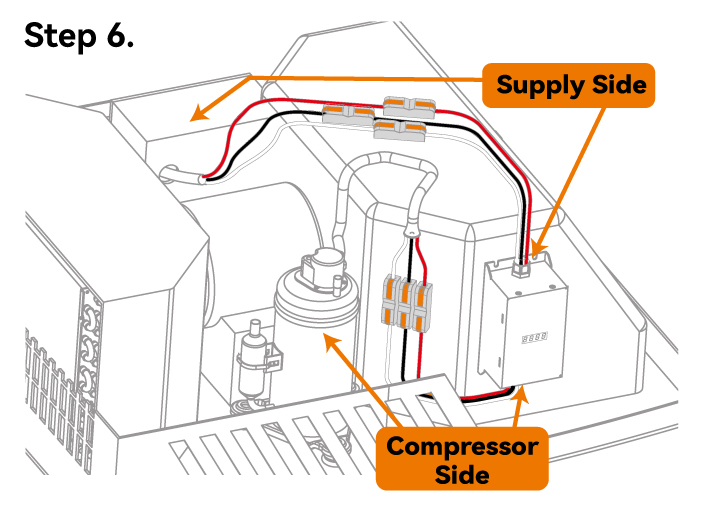
6

① On the compressor side, carefully match the cut run, start, and common wires coming from the compressor with the run, start, and common wires on the COMPRESSOR side of the soft starter. Strip each wire by ½" and terminate all 3 connections using closed end splice connectors. ② On the supply side, carefully match the cut run, start, and common wires of the A/C unit with the run, start, and common wires on the SUPPLY side of the soft starter. Strip each wire by ½” and terminate all 3 connections using closed end splice connectors, see diagram below. Ensure that all 6 crimped connections are firm and secure.

7

Ensure that the wire harness on both sides is securely routed within foam guides inside the unit. Clean the chosen mounting surface for the soft starter using the included alcohol pad.

Secure the soft-starter box in place with the adhesive tape on the backside and press firmly. Securely replace any foam covers and the top hood. Turn on power and verify operation.

Install Table

X-PLUS Soft Starter Configuration: R=WHITE, C=BLACK, S=RED

Install Table

X-PLUS Soft Starter Configuration: R=WHITE, C=BLACK, S=RED

TAKE 7 DAYS TO SEE

Rv Ac Soft Start controller

Here’s what makes Mint Mobile the smarter wireless choice.
Limited time offer. Online & new customers only, while supplies last. Purchase 3-month data plan ($45 upfront payment equiv. to $15/mo). Taxes & fees extra. Promotional rate for first 3 months only; no cash value. Unlimited using >40GB/mo. will experience lower speeds with video streams at ~480p. Restrictions apply. See terms here.
Nationwide Coverage for Less
Check the coverage in your area